








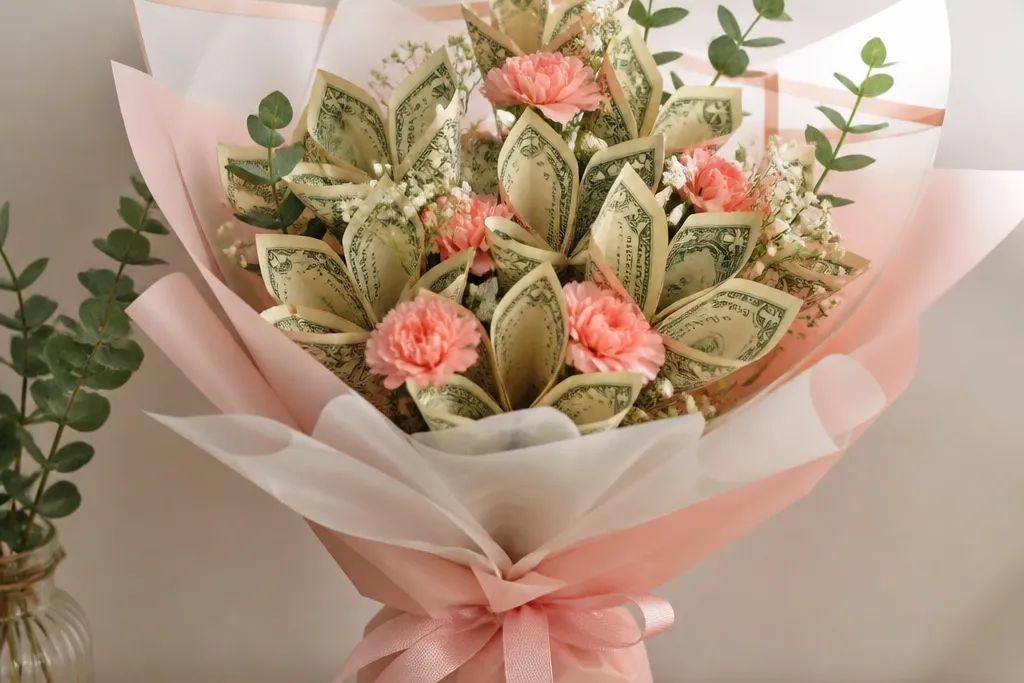

1. Classic Rose-Bloom Money Bouquet (Foam Cone Base)
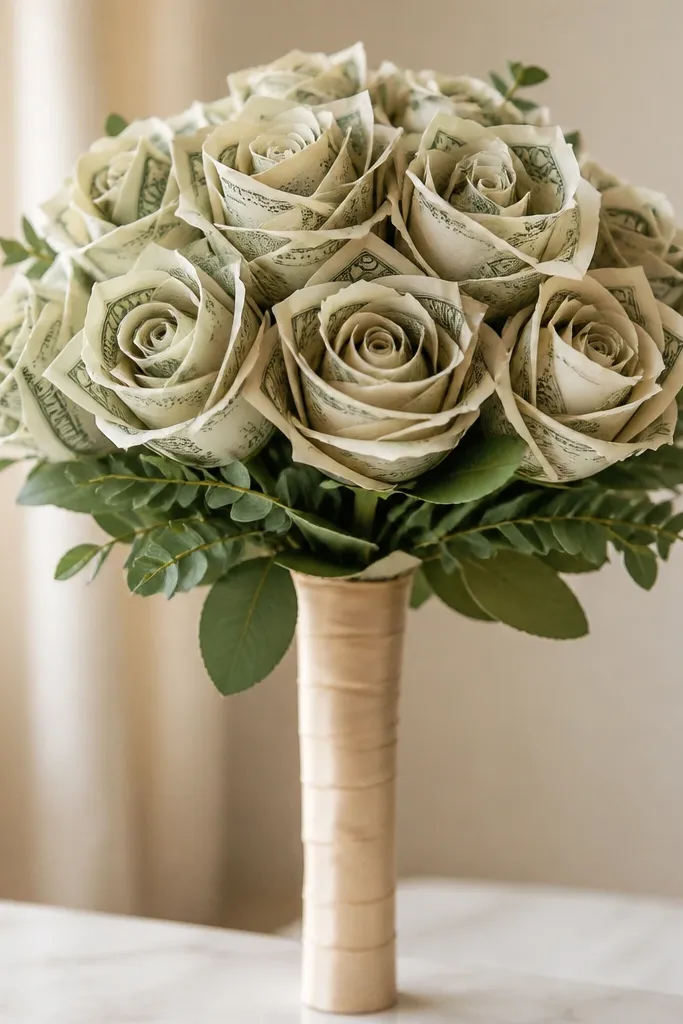
Start with a foam cone (or a small Styrofoam ball on a stick) so the bills can “sit” and form petals. Fold bills into simple fan or roll shapes, then press them into the cone layer-by-layer to mimic rose petals. The foam base is what makes it look full and intentional instead of flat.
Use double-sided tape dots on the foam cone before you place each bill piece — it keeps the petals from shifting while you wrap the handle.
2. Minimal One-Bloom Bouquet (One Crisp Bill Center)

This version is perfect if you want the clean aesthetic of a single statement bloom. Use one larger bill for the center and two smaller folded pieces as “side petals.” Keep the wrap simple — a tight paper or ribbon sleeve around the handle makes it look more expensive.
Good to knowIf your bill is long, fold it in half lengthwise before shaping so it stays tidy and doesn’t droop.
3. Blush + Gold Pastel Money Flowers (Soft Ribbon Petals)

Pair bills with blush ribbon to soften the look. Cut ribbon into short loops, then tuck them behind the bill petals so the bouquet has a layered, boutique vibe. Gold accents (a thin ribbon or small bow) add warmth without overwhelming the money centerpiece.
Choose ribbon that matches the bill tone (cream/green) so the colors blend instead of fighting for attention.
4. Black Tie Elegant Bouquet (Matte Paper Wrap)

For a dramatic, modern look, wrap the handle in matte black paper or fabric and use a tighter bill arrangement. Keep the bill folds consistent so each “petal” lines up like a formal bouquet. Add one thin ribbon stripe to create a “tailored” finish.
Use a hot glue dot only at the base of each fold — too much glue can make bills look lumpy.
5. Garden Party Bouquet (Faux Greenery Frame)
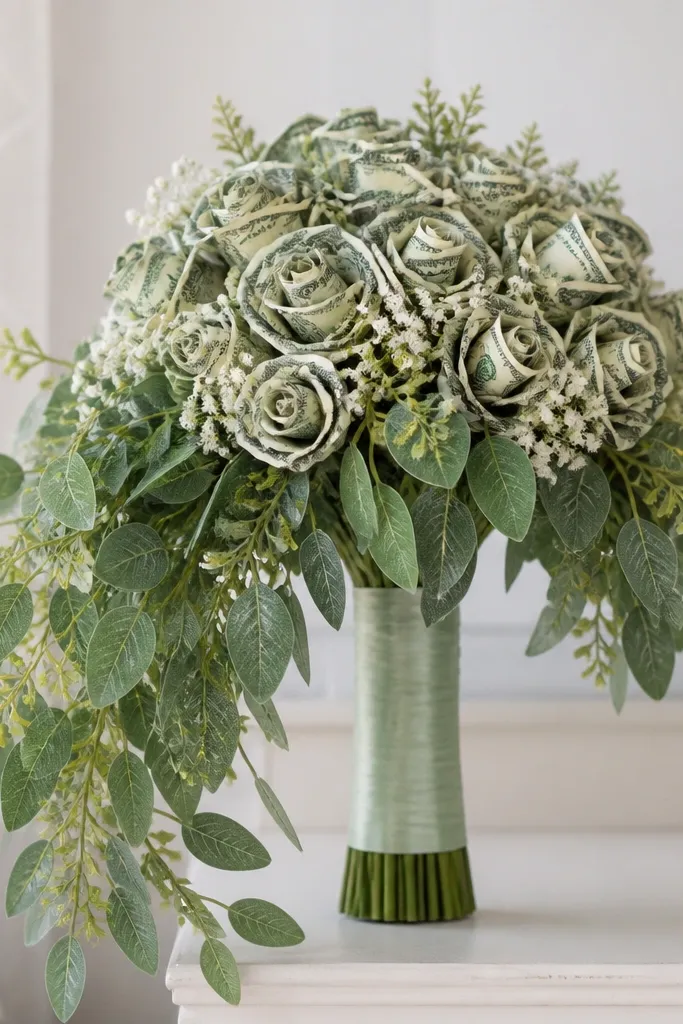
Faux greenery makes money flowers feel like real arrangements. Add a few leaf picks around the foam cone so the bills don’t look like they’re floating. This also helps hide the places where the bill petals meet the base.
Good to knowTrim leaf picks so they’re all the same length — uneven greenery can make the bouquet look messy in photos.
6. Confetti Celebration Bouquet (Bright Ribbon Pop)

If the gift is for a birthday, add a bright ribbon “halo” around the money petals. Make small loops and secure them at the cone edges so they peek out like confetti. Alternate ribbon colors on the handle to keep it festive without cluttering the top.
Stick to 2-3 ribbon colors maximum so the bouquet reads as cohesive, not chaotic.
7. Monochrome Chic Bouquet (All-White Wrap + Silver Bow)

Monochrome looks high-end because it lets the texture of the money folds be the “design.” Wrap the handle in white paper or fabric and finish with a silver bow for contrast. Keep extra decorations minimal so the bouquet stays sleek.
Good to knowPress the bill folds gently with your fingernail before attaching — crisp edges look sharper.
8. Kids-Friendly Starter Bouquet (Paper-Backed Bills)

For beginners or younger crafters, sandwich bills between thin cardstock or glue them to a sheet so they don’t curl as you shape them. This version is easier to handle and makes the petals look smoother. Use washable glue or double-sided tape to keep it simple and safer than hot glue.
Good to knowPractice with a scrap bill first — you’ll learn how tight to roll the petals so they hold their shape.
9. Wedding-Ready Bouquet (Pearl Picks + Satin Ribbon)

To make it feel wedding-ready, use satin ribbon and add pearl picks around the cone. Satin looks smoother than grosgrain, giving the bouquet a bridal finish. Pearl accents also help hide small gaps between bill petals.
Insert pearl picks after the money petals are in place — you can adjust coverage where you see gaps.
10. Farmhouse Charm Bouquet (Twine + Kraft Paper Wrap)

Farmhouse style is all about texture. Wrap the handle in kraft paper, then spiral twine for grip and visual interest. Keep the bill petals slightly looser so the bouquet looks handmade, not machine-perfect. Add a small tag for a charming finishing touch.
Good to knowIf you’re using twine, glue the ends flat at the back of the stem so the front stays clean.

