










1. Foam-Cone Money Bouquet with Roses (Classic Blush)

Start with a foam cone (or a thick floral foam block carved into a cone). Cover it with blush satin ribbon so you don’t see foam gaps. Tuck rose elements (crepe paper roses or fabric roses) into the top and mid layers, then anchor money bundles behind them so the bouquet stays full from every angle.
Good to knowPush each bill into the foam at a slight downward angle so it “locks” and doesn’t slip out when you move the bouquet.
2. Cash Rose Tips: Folded Bills as Petals

Fold individual bills into petal-like rolls: crease the bill, roll one edge inward, then pinch the base. Hot-glue or tape the base to a small floral pick so the roll reads as a rose bud. Combine 3-5 cash petals per rose, then add a real-feel crepe paper leaf behind for balance.
Good to knowUse a bone folder to sharpen creases before rolling — it makes the petals look crisp in photos.
3. Crepe Paper Roses + Hidden Bill Clips

Make crepe paper roses with slightly varied pink shades (light blush + medium rose). Instead of gluing bills directly, attach small binder clips or mini clothespins to the back of rose stems and slip bills in. This keeps money removable and prevents tears from repeated handling.
Good to knowWrap the clip area with a narrow strip of ribbon to hide hardware while keeping bills easy to refresh.
4. Fabric Rose Bouquet with Satin Ribbon Handle

Choose fabric roses that already have wired stems for easier placement. Arrange roses in a gradient: lighter blooms near the top, deeper pink near the base. Insert rolled bills between stems, then finish the handle with satin ribbon spirals so the bouquet looks couture instead of craft-store simple.
Good to knowAdd a small foam pad under the bottom roses so the handle doesn’t tilt and the bouquet stays upright.
5. Dollar-Bill Origami Roses on a Wire Frame
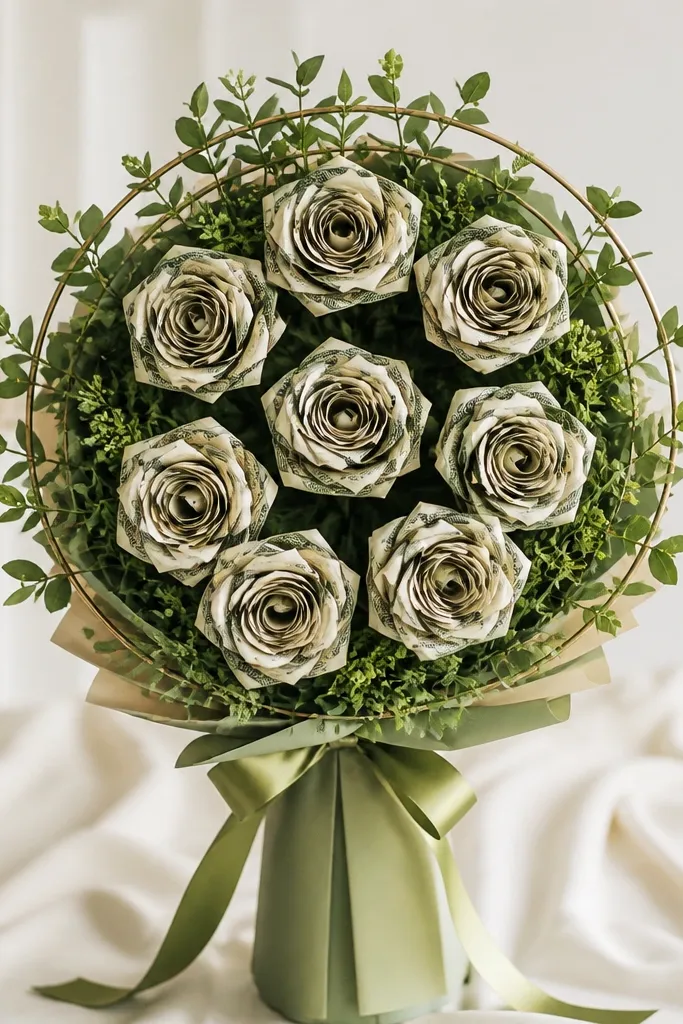
Build a wire armature (a hoop ring + vertical support) so you can shape the bouquet like a real floral arrangement. Create origami-style money roses by folding bills into layered points and pinning them to a small wire bud. Wire frames let you angle roses outward for a fuller, more “bouquet” silhouette.
Good to knowWrap wire contact points with floral tape — it prevents sharp edges and keeps roses from slipping.
6. Monochrome Cream Roses with Gold-Edge Bills

Use cream roses (crepe paper or fabric) and pair with ivory ribbon for a timeless palette. To add a “luxury” feel, lightly brush the bill edges with gold acrylic paint and let dry fully. Tuck the gold-edged bills between rose clusters so the shine appears only in highlights.
Good to knowDo a quick test on one bill edge first — a light hand keeps it classy, not messy.
7. Blush-and-White Rose Cascade (Front-Facing Cash)

Arrange roses in vertical layers: top cluster, then a mid band, then a lower cascade. Place bills so their faces angle outward, not sideways, for maximum visibility. Add a few trailing crepe paper ribbon strips at the base to mimic a bridal bouquet movement.
Good to knowSecure only the top corners of each bill — leaving the lower edge free makes the cascade look natural.
8. Mini Rose Buds + One Statement Cash Bundle
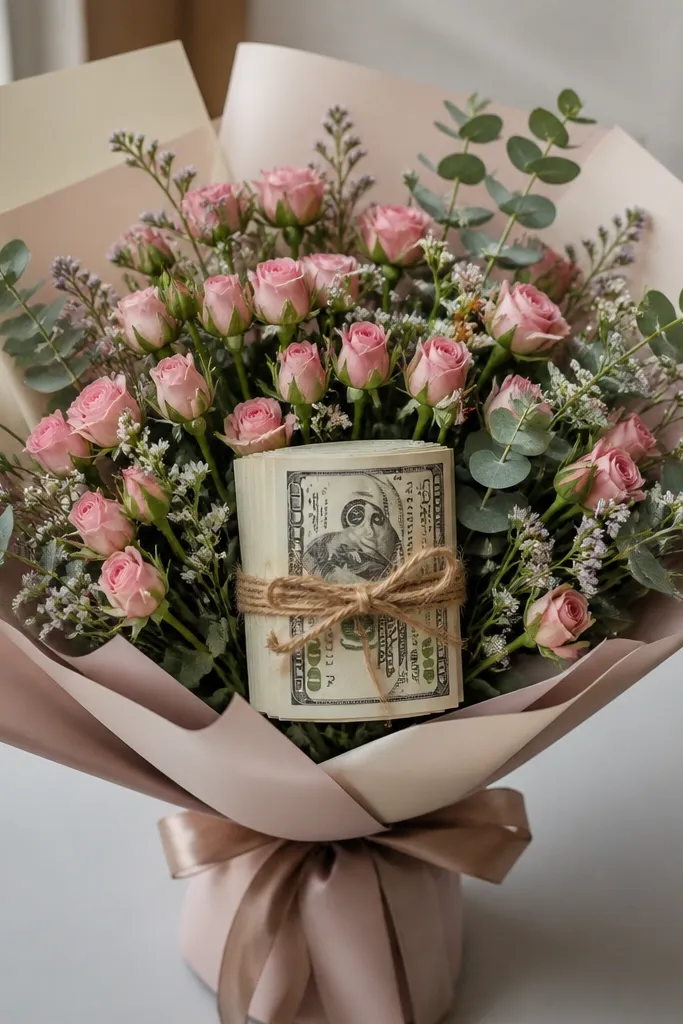
Create a “busy-but-clean” look by using mini rose buds around the whole bouquet. Then center one statement cash bundle: stack bills, band them with a thin ribbon, and attach to a central rose pick. This gives the bouquet a focal point while keeping the rest light and airy.
Good to knowChoose one ribbon color for the whole piece (like blush or sage) so the focal cash bundle looks intentional.
9. Rose + Eucalyptus Filler for a Fresh Garden Look

Add realistic filler with eucalyptus picks (silk or paper leaves). Place eucalyptus behind the roses to frame the money bundles and hide foam seams. This garden look works especially well for spring birthdays and anniversary gifts.
Good to knowCut eucalyptus stems into shorter pieces so they don’t overpower the roses — aim for 1-2 leaf clusters per side.
10. Clear Cellophane Wrap + Rose Topper (Photo-Ready)

Wrap the finished bouquet in clear cellophane to protect crepe paper edges and keep dust off. Tie with a satin ribbon bow at the bottom and add a small rose topper on the cone tip for a polished finish. The transparency makes the money and roses pop in photos without needing extra decorations.
Use double-sided tape along the inner cellophane seam — it keeps the wrap smooth and wrinkle-free.

